Make Your Own Industrial Style Lamp
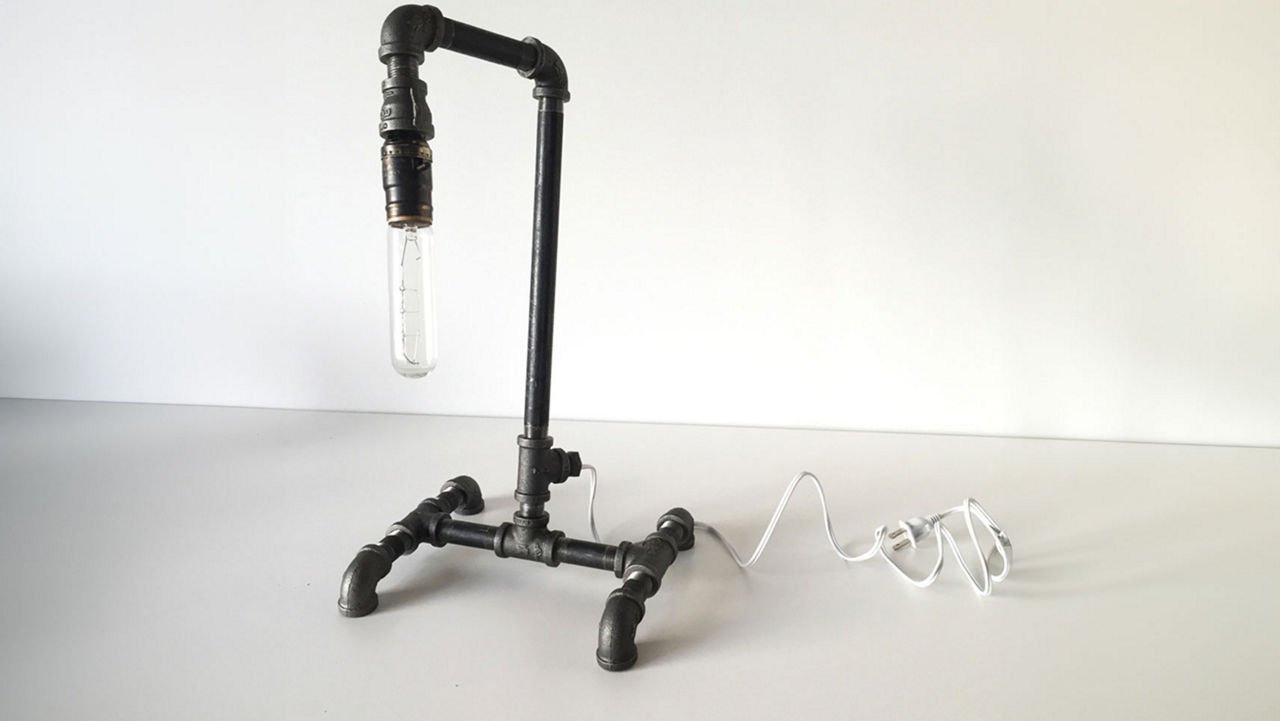
Inspired by old industrial era décor? Who isn’t! In this tutorial, learn to build your own industrial style table lamp and adapt it to fit your space!
This lamp is composed of over a dozen pieces of metal piping, which means it’s easy to redesign or alter.
I built my lamp for about $80, but you can design a simpler lamp to fit your budget. Try a minimalist single-pipe design, or a design with a simpler base to fit a smaller budget.
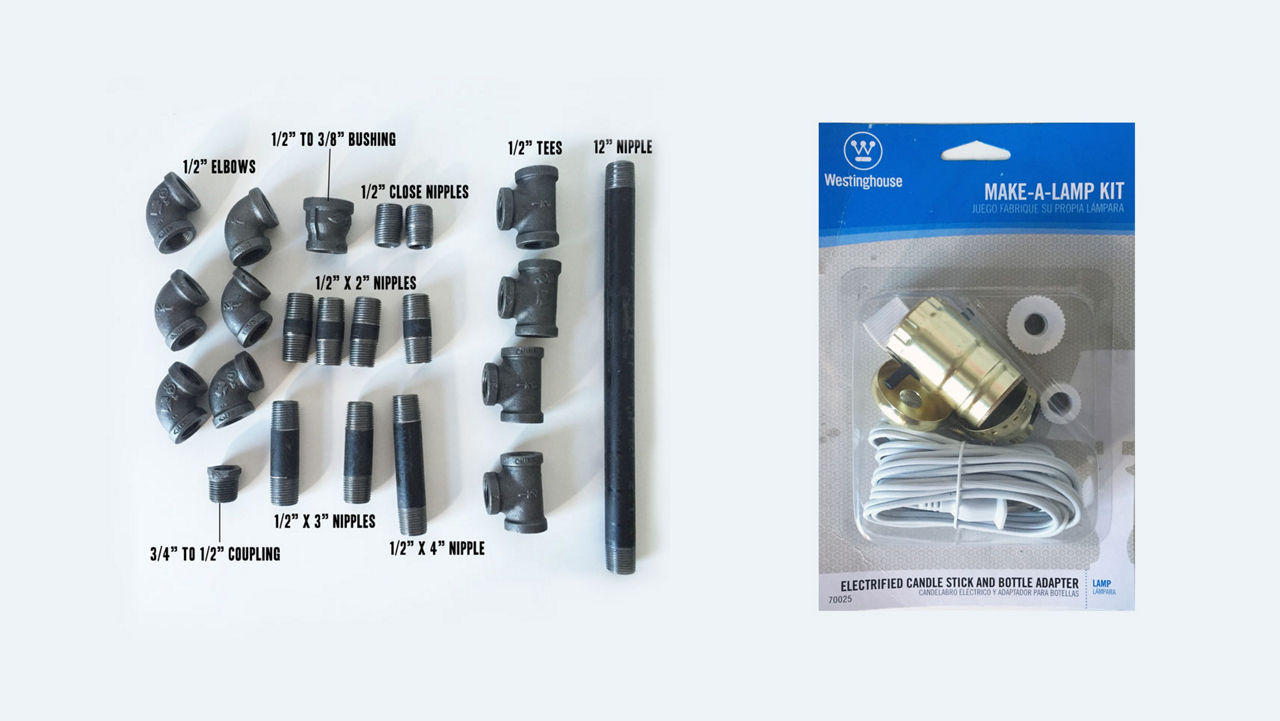
Alright, let’s get started! I bought most of my supplies, including all metal piping and electric wiring, from Valu Home Centers. I purchased my filament bulb an online site. All other supplies can be found at your local craft store.
For this project, you'll need:
- Make-A-Lamp Kit
- Black Piping:
- (4) Black Nipple ½” x 2”
- (6) Black Elbow 90 degree ½”
- (2) Black Nipple ½” x 3”
- (1) Black Nipple ½” x 4”
- (2) Black Nipple ½” x Close
- (1) Black Nipple ½” x 12”
- (4) Black Tee ½”
- (1) Black Bushing ½” x 3/8”
- (1) Black Coupling ¾” x ½”
- Sticky Tack (quarter sized amount)
- Black Chalkboard Style Spray Paint
Step 1: Start by assembling the base.
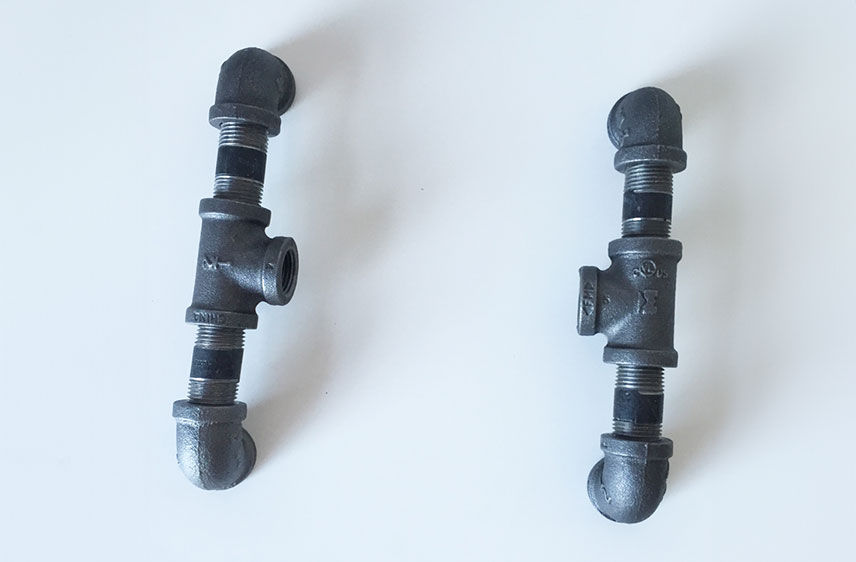
The base consists of four elbows as feet, four 2” nipples, and two tees. *Note: piping will not screw on completely. Some parts may be looser than others. Twist parts to the best of your ability to model your lamp according to the photo.*
Step 2: Next attach the two legs with two 3” nipples and another tee.
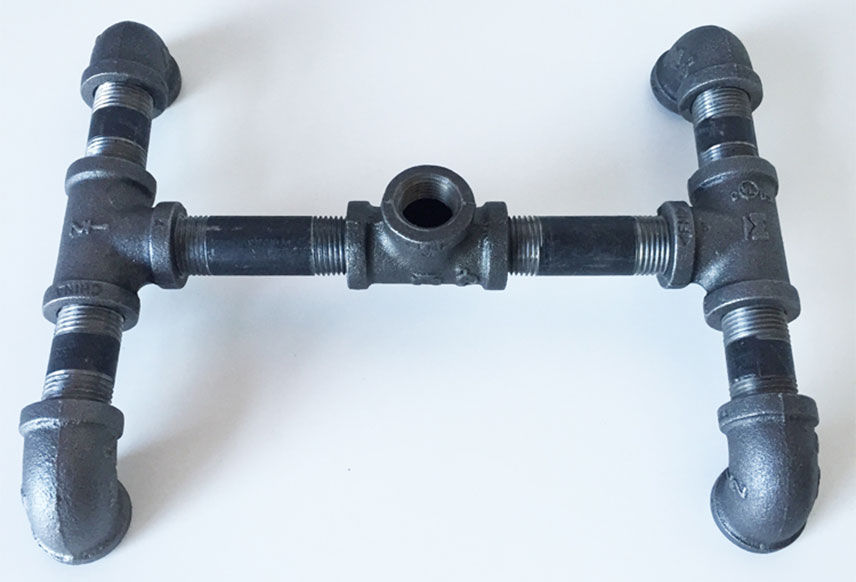
Step 3: Continue building with a close black nipple and tee.
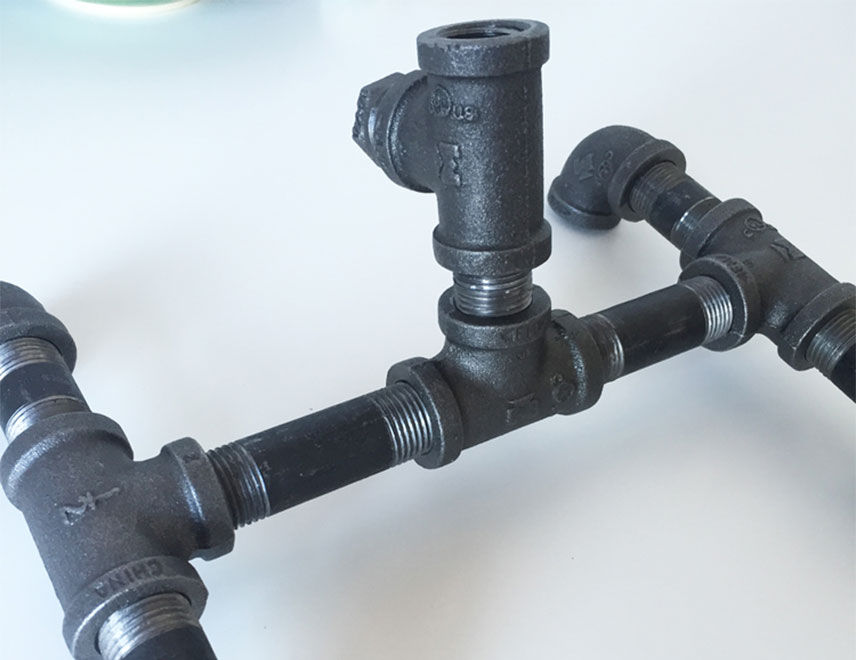
Attach the smallest piece of black coupling to the tee. This is where the cord and plug will exit through.
Step 4: String the cord through the hole in the tee.
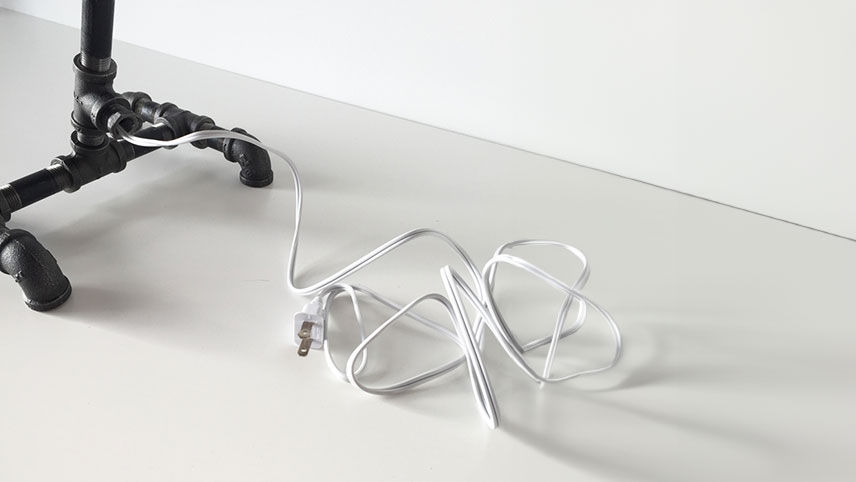
Step 5: Build the rest of the lamp base.
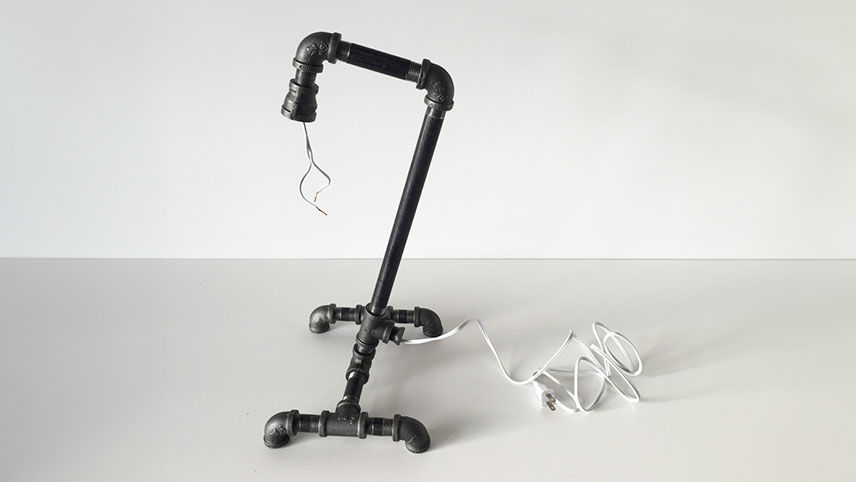
Continue stringing the tip of the wiring through the pieces of piping as you build the rest of the lamp base. End with the wiring sticking out of the end of the 3/8” bushing. Leave about 2” exposed.
Step 6: Wiring kit and assembly
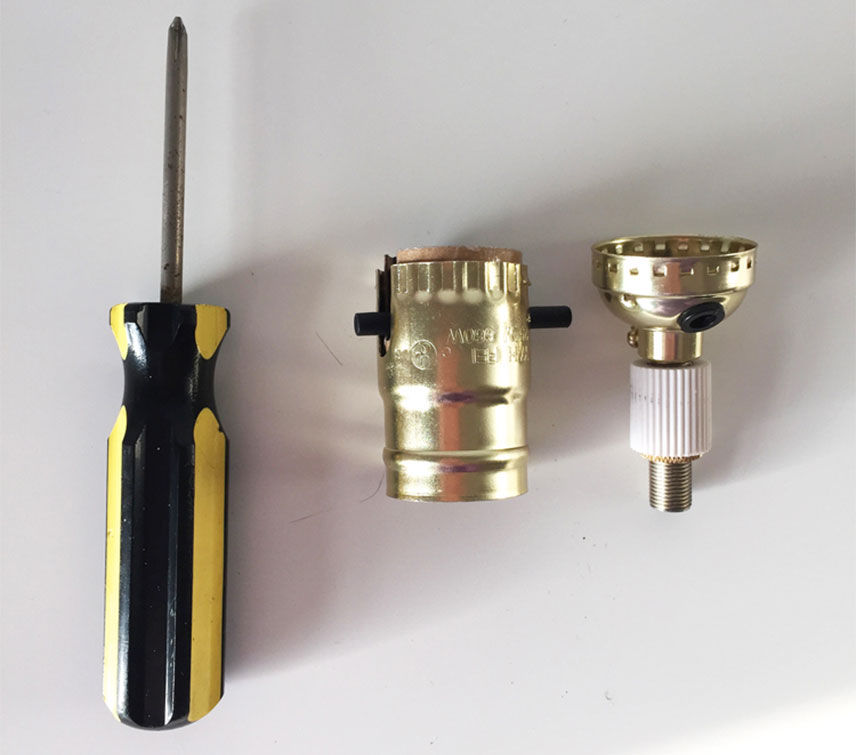
Unpack the lamp wiring kit and assemble loose pieces according to instructions.
Step 7: Spray paint the metal pieces with black spray paint.
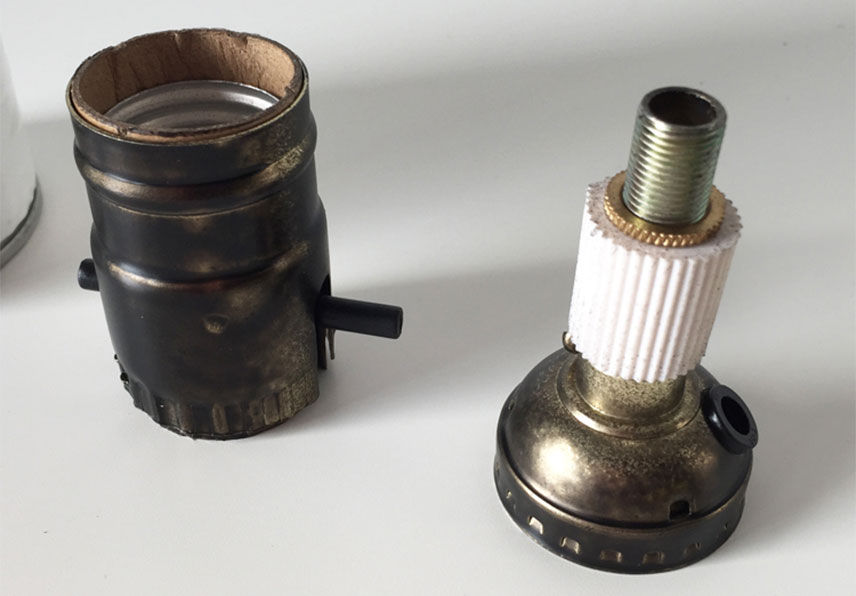
Spray paint in short bursts to create a distressed, vintage look. Use a hair dryer for quick drying or let dry overnight.
Step 8: Attach the wiring
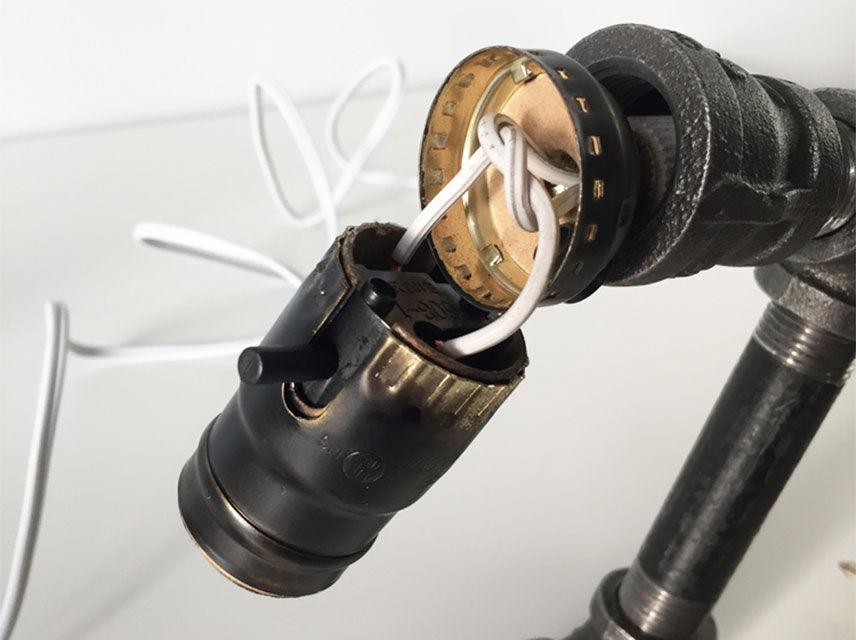
Attach the wiring to the indicated screws on the interior socket piece, according to the instructions. Attach the socket shell over the socket interior, and slide the entire fixture into the 3/8” coupling. Pull the cord from the opposite end to tighten the fixture.
Step 9: Use the sticky tack to secure the fixture inside the coupling.
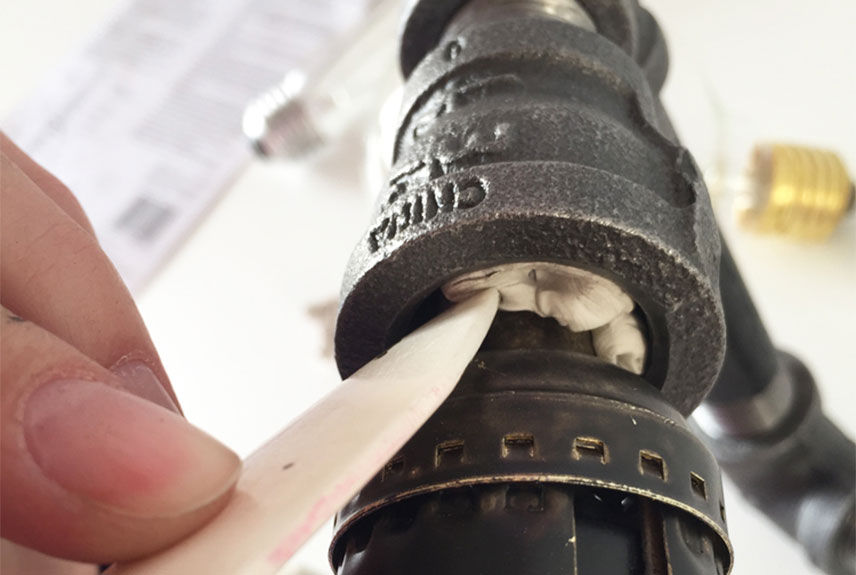
Use a bone folder, or another slim tool like a butter knife to shove the sticky tack inside the pipe. Use as much as needed to ensure the fixture does not move.
Step 10: Screw in the lightbulb and you are done!

Swivel the tee at the base so it rests at a 45 degree angle to the desk. Swivel other parts of the lamp to adjust it to your liking! Experiment with different styles of bulbs to get the exact look you want.
Samantha Epps creates homemade fine arts and crafts for The Owlery in Buffalo, NY. You can shop her collection here!